Affordable alternative to Microsoft Office!
Download 30 days free trial of SoftMaker Office 2024 for Windows, Mac and Linux.

Write. Calculate. Present.
SoftMaker Office 2024 includes TextMaker, PlanMaker and Presentations.

TextMaker
The modern word processor TextMaker lets you create documents of any size in next to no time – be it a flyer, a brochure, a business letter or a complete scientific paper. Thanks to its native use of the DOCX file format, your documents are always compatible with Microsoft Word. Learn more…
PlanMaker
The powerful spreadsheet program PlanMaker makes creating worksheets and charts of any complexity a cinch – from a simple timetable to the complex financial planning. Thanks to its native use of the XLSX file format, your worksheets are always compatible with Microsoft Excel. Learn more…
Presentations
Create impressive slide shows with Presentations. Thanks to breathtaking animations and slide transitions and sophisticated master pages, you are well-prepared for every presentation. As Presentations uses the PPTX file format natively, document exchange with PowerPoint is fully seamless. Learn more…
Latest Articles…
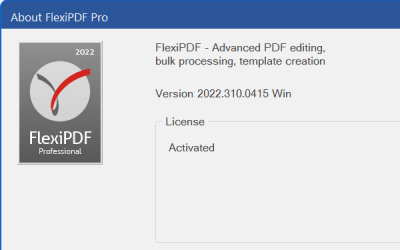
FlexiPDF 2022 revision 310 has been released
FlexiPDF 2022 revision 310.0415 has been released at: https://alternative2office.org/downloads/. Promotional price is $69.95 and includes license for three (3) computers in the same household. This update is free for all previous FlexiPDF 2022...
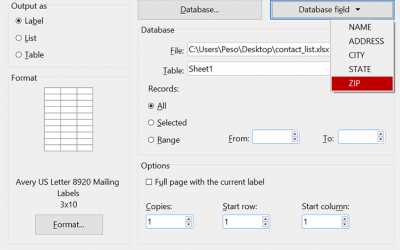
Mail merge to labels or envelopes in SoftMaker Office 2024
Discover the streamlined efficiency of SoftMaker Office 2024's mail merge feature, designed to simplify label and envelope creation for bulk mailings. With just a few clicks, you can initiate the process, customize templates, insert merge fields,...
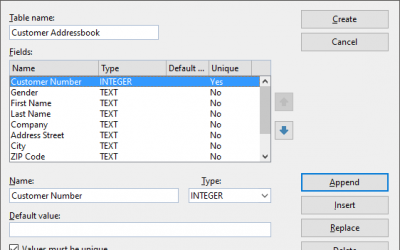
How to create SQLite or dBase database file in SoftMaker Office 2024
Discover seamless database integration in SoftMaker Office 2024. Whether it's mass mail merges or printing customized envelopes and labels, merge your document content effortlessly with your data. Utilize PlanMaker, Excel, or CSV files as natural...
SoftMaker Office 2024 revision 1210.0217 has been released
SoftMaker Office 2024 rev 1210.0217 is available through automatic updates. Pricing starts at $79.95 for Standard Edition. This update is free for all previous SoftMaker Office 2024 users. SoftMaker Office 2021 or older, Kingsoft Office, BinaryNow...

Students and educators save money on SoftMaker Office and FlexiPDF with ThinkEDU
Explore exclusive student and educator savings as BinaryNow teams up with ThinkEDU to present the ESD (downloadable) versions of SoftMaker Office Standard 2024, SoftMaker Office Professional 2024, and FlexiPDF Professional on their website and...

SoftMaker Office 2024 revision 1208.0127 has been released
SoftMaker Office 2024 rev 1208.0127 is available through automatic updates. Pricing starts at $79.95 for Standard Edition. This update is free for all previous SoftMaker Office 2024 users. SoftMaker Office 2021 or older, Kingsoft Office, BinaryNow...
